The Table That Teaches Itself: Turning Anatomy Into Clinical Reasoning with S.Vision
November 01, 2025
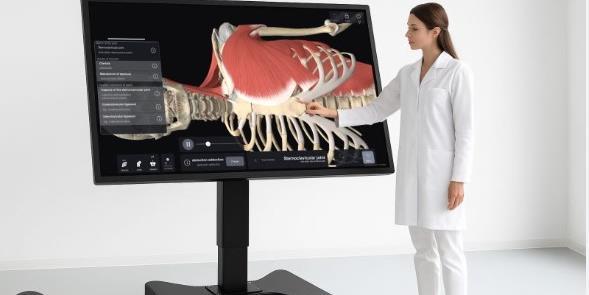
There’s a moment in every lab when students stop labeling and start navigating. Muscles and vessels turn from facts into landmarks; planes become choices; structures turn into risks you either respect or regret. A 3D anatomy table does more than look impressive—it creates that moment on demand, letting groups peel layers, slice in any plane, and jump between body and imaging without breaking the thread. Used well, it becomes the backbone of an anatomy-through-to-clinic curriculum that sticks.
In this guide, we’ll show how to build a high-yield, low-friction program around a modern 3D anatomy table—one that blends gross anatomy, radiology, pathology, and procedural planning into a single learning spine. If you’re wondering where to start, start here: with a cadence that compacts time to understanding and a scoring model that turns exploration into evidence.
What “usable realism” actually means
Forget pixel worship. The realism that changes behavior is cognitive, not cinematic:
- Layer control that respects relationships. Glide from skin to fascia to neurovascular bundles and organ segments; isolate or fade layers without losing context.
- Bidirectional imaging sync. Slice the body axially, coronally, or sagittally and see a matching CT/MRI view update instantly—or start from a DICOM stack and project back onto 3D.
- True multi-user manipulation. Four to eight hands can rotate, clip, measure, and annotate without fighting the interface.
- Educator-first authoring. Pin labels, save “states,” assemble playlists, create spotters/OSCE stations, and export grades in minutes—not hours.
When those four are present, the table stops being a demo and becomes a dependable lab.
Build around relationships, not lists
Lists collapse under clinical pressure; relationships survive. Make every task force adjacency, depth, or consequence:
- “What lies deep to this?”
- “Which neighbor is at risk if you slip here?”
- “Rotate to the plane that improves this view.”
- “If injured, what single deficit would you expect—and why?”
This turns labeling into reasoning and primes learners for rounds, scans, and procedures.
A 10-week arc you can run without burning faculty time
Short, predictable sessions beat rare, heroic mega-labs. Keep each week to 60–75 minutes; prep under 15 thanks to reusable playlists.
Week 1 — Planes, anchors, orientation speed
Teach axial/coronal/sagittal with three anchors (heart, liver, knee). Drill: stabilize a plane, identify two landmarks, rotate to a better view in <20 seconds.
Week 2 — Vessels as a road network
Walk portal vs systemic pathways; show where mixing happens. Task: trace a drop of contrast from splenic vein to right atrium, then confirm on axial CT.
Week 3 — Nerves and danger zones
Brachial plexus, facial nerve, sciatic pathway; overlay common entrapments. Case bite: foot drop after hip surgery—pin the most likely lesion and the exam sign.
Week 4 — Segmental logic that guides surgery
Hepatic segments, bronchopulmonary segments, renal segments. Draw a safe resection line; defend it on cross-sections.
Week 5 — Imaging literacy by doing
Sync 3D anatomy with CT abdomen and MRI brain. Drill: find it on 3D, prove it on axial, then show one coronal slice that clarifies the relationship.
Week 6 — Routes of spread
Peritoneal reflections, retroperitoneal “highways,” sinus tracts. Mini-scenarios: contrast appendiceal perforation vs subphrenic abscess migration.
Week 7 — Procedures and safe windows
Central lines, chest tubes, lumbar puncture, abdominal incisions. Mark surface landmarks; verify the path on slices.
Week 8 — Variants that change decisions
Aberrant right subclavian, replaced hepatic arteries, accessory renal vessels, Circle of Willis variants—identify, risk, workaround.
Week 9 — Neuro navigation
Internal capsule, thalamic nuclei, brainstem levels; tie named syndromes to lesions in two planes.
Week 10 — OSCE rehearsal & portfolio export
Timed stations mixing identify/relate/orient/explain. Auto-save results and prescribe 5-minute micro-reps by weak category.
A scoring spine that motivates, not intimidates
Make assessment transparent and fast so it fuels learning:
- Locate (2 pts): tap/outline within tolerance.
- Relate (2 pts): name the closest at-risk neighbor or “what lies deep to this plane.”
- Orient (1 pt): state the plane and the rotation that would improve visibility.
- Explain (2 pts): one-sentence clinical implication.
- Time bonus (up to 3): finish early, no hints.
Show scores instantly. Tag misses by pattern (“ureter vs uterine artery,” “MCA vs ACA territory”) and assign targeted micro-reps for the next session.
Case-based huddles that feel like the wards
Turn the table into a mini clinical conference with small “case cards”:
- Prompt: RUQ pain after a fatty meal.
- Tasks: show the gallbladder bed, trace cystic duct to CBD, mark the triangle required for a “critical view,” flip to axial CT and predict where a stone causes jaundice.
Because every claim can be tested in seconds, discussion becomes sharper and more collaborative.
Make radiology a first language, not an elective
Don’t silo imaging until clerkships. Embed it from week one:
- Lock to slices: walk a vessel level-by-level and watch it morph on 3D.
- Flip mid-task: “Great—now find that on coronal.” Mental rotation becomes automatic.
- Add ultrasound windows: overlay probe position and expected views; reconcile surface landmarks with sonography.
Orientation lag drops when learners pivot across views a dozen times per hour.
Five high-yield drills you can run tomorrow
- Stroke corridors: outline MCA/ACA/PCA territories on 3D; confirm on axial MRI; predict two deficits from two lesion sites.
- Pelvic thread-through: trace ureter kidney→bladder, stop at three danger points, and show a safe retraction path.
- Chest tube confidence: place a tube on surface anatomy; verify its trajectory matches the safe triangle on coronal CT.
- Portal puzzles: follow portal triads; sketch a segment-sparing resection line; justify on imaging.
- Knee anchors: show ACL/PCL footprints; correlate with sagittal MRI; link to drawer tests.
End each with a two-minute “find-it-fast” race to build scan speed.
Ergonomics for learning, inclusion for equity
Small choices raise the baseline for everyone:
- High-contrast labels and color-blind-friendly palettes.
- Captions on saved walkthroughs; large-target UI and optional stylus.
- Mirrored text prompts on a side display for text-first learners.
Inclusion isn’t extra credit—it’s how more students cross the competence line, faster.
Governance and uptime: quiet heroes of great labs
If you import real studies, de-identify and use a simple approval flow. Keep role-based access (faculty edit; students annotate), and version your “gold master” playlists so lessons never get overwritten.
Treat the table like a clinical asset:
- Quarterly touch and color calibration.
- “Clean slate” reset between cohorts; spare styluses and wipes within reach.
- One-page rescue card for the five common hiccups; log fixes so trends surface early.
Reliability earns calendar space. Calendar space builds competence.
Beyond pre-clinicals: one platform, many departments
- Surgery: incision planning, segmental resections, nerve-sparing corridors, trocar mapping.
- Emergency medicine: trauma windows, pneumothorax landmarks, rapid stroke orientation.
- OB/GYN: pelvic floor mechanics, uterine blood supply, ureter safety along the uterine artery.
- Neurology/Neurosurgery: deep nuclei, white-matter tracts, brainstem sections tied to named syndromes.
- Anesthesia & Pain: airway geometry, epidural routes, plexus blocks with ultrasound correlation.
- Physiotherapy/Sports: attachments, myotomes, kinematics linked to exam maneuvers.
A shared canvas builds shared mental models—and smoother care.